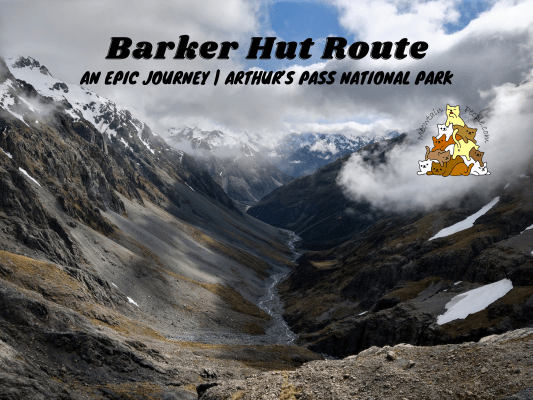
The Barker Hut and the journey to reach it would be my most epic adventure in New Zealand if I have to choose one. Sitting on the top of a large bluff far from civilization, surrounded by gigantic ranges of mountains and a steep valley down the White River, getting to the epic Barker Hut is not an easy feat to achieve!
This trip was done in late spring, during a short window of good weather between wet, cold days.
How Difficult Is Barker Hut Route?
For starters, it is categorized as “Expert: Route”, the highest difficulty level in New Zealand’s six track categories. It is indeed a full-on route with some markers and minimal formed tracks. Plus, there will be A LOT of river crossings where there are no specified routes but ones you need to decide where to cross safely and efficiently.
This is especially the case in the beginning (also the middle and ending sections; to be written in details in the post) of the route where you walk on the wide and long braided riverbed of Waimakariri, crossing the many split rivers that can be deep and fast-flowing at sections. One point I almost lost my footing and nearly got swapped away by the cold river.
Furthermore, the Waimakariri river can rise and flood very fast and it is very dangerous to be caught in the middle of the vast riverbed area when that happens. So, it is very important to check the weather conditions and forecast before your trip. You should drop by at Arthur’s Pass National Park Visitor Centre to check the water level situation with the DoC rangers and to get some tips or advice for your trip.
Other than that, there are steep marked / mostly unmarked routes along the valley to Barker Hut with many rock falls / slips hazards. There’s a dangerous impassable ravine to avoid by getting up the valley to traverse around it.
Not to mention, you need to study the map, use a compass, have very good navigation and route-finding skills, and to know which directions to go. For parts of this journey, you could only refer to the landscape and general directions as a guide to your waypoints.
Last but not least, there may be avalanche danger from May to November, and outside this period when there’s snow coverage. The alpine environment around Barker Hut can be very cold anytime of the year, so taking warm clothing with you is essential all year round.
Distance from Klondyke Corner trailhead to Barker Hut is 21.8km with 1,366m of elevation gains.
Barker Hut VS Carrington Hut & Anti Crow Hut Booking
Unlike Carrington Hut and Anti Crow Hut that are Department of Conservation (DoC) huts that you’ll pass by on the way to Barker Hut, Barker Hut is owned by Canterbury Mountaineering Club (CMC). The club members get to stay in Barker Hut for free, while non-members need to book and pay ($10 per night) in advance. You can make the booking and payment for Barker Hut at the CMC website here.
On my trip, I hiked all the way to Barker Hut in one day, and all the way back out the second day, without staying at the other huts. However, I highly recommend making it a 3-4 day trip, staying in Carrington Hut on the first and last night. This gives you enough time to explore more around the area and without having to rush for your destination.
For Carrington Hut (serviced 36 bunks hut) and Anti Crow Hut (standard 6 bunks hut), no booking is required (first come, first serve). You need to purchase a serviced hut ticket ($25) for Carrington Hut (per night), or a standard hut ticket ($10) for Anti Crow Hut (per night), beforehand and put it in the honesty box in the hut. The closest place to purchase the hut ticket is at the Arthur’s Pass National Park Visitor Centre in Arthur’s Pass Village. You can also buy the hut tickets from any other visitor centers or retailers.
Barker Hut / Carrington Hut Trailhead Access
There are two options to start the hike to Barker Hut (as well as Carrington Hut).
The first choice is from the western side of Klondyke Corner Campsite. If you are driving down from Arthur’s Pass Village, you’ll see two entrances on each side of the highway, and the main area of the campsite is on the left (with the signboard showing Klondyke Corner). However, you should turn to the right as below (there’s a signboard showing Waimakariri Valley) for the starting point for your hike.
After turning into the road, drive around 1.5km all the way to the end. That’s where you could park your car and start the hike.
This starting point is suitable when the Waimakariri river is low and safe enough for crossing, as you will have to walk the wide braided river from here.
The second option is to start the hike from the other side of the river from O’Malleys Track car park and follow the forested track to Anti Crow Hut and beyond. By using this track it adds around 2km of total distance (per way) to your trip. This is usually the “second choice” flood track when the river is too high and unsafe to cross. Do take note that there were several break-in reports for overnight cars parked at this spot, so weigh your risks, and not to store valuable items in the car.
Klondyke Corner Trailhead to Anti Crow Hut
9.26am: Starting from the road end car park of Klondyke Corner Campsite, the journey starts right away by walking onto Waimakariri river bed with multiple braided rivers to cross along the way.
(+12)9.38am: Couldn’t be seen from eye level shot here but there are many split rivers in between the two sides. The land you see ahead is not the opposite side but a patch of dry land in between the braided rivers.
(+12)9.50am: After crossing the split rivers, I arrived at the area called Turkey Flat.
Now, you can choose to walk all the way across to the other side until you meet the O’Malleys Track to continue to Anti Crow Hut (purple line); you might find some trails on Turkey Flat to lead you to the track, if not, just navigate towards the general direction of the side until you intercept the track. Alternatively, you can make a direct beeline (kinda) on the Waimakariri river, cutting straight through the braided riverbed into the valley to Anti Crow Hut (blue line).
The blue line is straightforward and quicker (or slower, depending on the river conditions and chances of having to find suitable spots to cross the rivers). The purple line is the safest bet as it goes through pretty well maintained O’Malleys Track to Anti Crow Hut without unnecessary river crossings. Having said that, I went for the beeline option (blue line) suggested by the DoC ranger on duty that day at the visitor center.
Same lines drawn but on Google Maps satellite image. This is to explain the reason you need to cross more rivers if you take the blue line. Notice the red circle added on the map, that’s a high eroding river bank that prevented me from walking just on one side of the river. Instead, I had to cross multiple rivers again to the middle of Waimakariri river, and then another one or two more to the bank of Anti Crow Hut. The red circle area was also the part where the river was deeper and faster. That’s where I almost lost my footing and nearly got swapped away by the current, I had to stop my attempt of crossing it halfway through and headed back on land to find a safer spot to cross).
(+17)10.07am: This is the part of the red circle mentioned above: high riverbank wall on the left with deep water; in front is the fast flowing river, it looked shallow at the sides but was more than waist deep in the middle. You could backtrack and find a suitable spot to climb up the Turkey Flat area, but you might need to backtrack quite a bit due to the thick thorny native matagouri shrubs blocking the way. What I did was to head a little downstream towards the middle of the braided riverbed, and find some more shallow / slower flowing spots to cross.
(+67)11.14am: Got delayed by some river crossings and side-tracked by some marked trails on the land that led to impassable thick bushes. But right ahead in the distance is the Anti Crow Hut.
Anti Crow Hut to Carrington Hut
(+9)11.23am: Arrived at Anti Crow Hut.
Interior of Anti Crow Hut. It is one of the few largely unchanged former New Zealand Forestry Service (NZFS) classic ‘six bunkers’ left in Arthur’s Pass National Park.
(+1)11.24am: The trail continues at the back of the hut through a short section of forest.
(+3)11.27am: The trail leads to the open. Search out for the pole markers that can be far apart from one another.
(+6)11.33am: Passing through a wide grassy land with “an army” of standing dead trees.
I got kinda lost as I simply followed one of the many faint goat tracks on the wide grassy land and couldn’t locate the actual trail through a section of woodland. Instead, I entered a trail-less woodland with trees just apart enough for me to traverse through the general direction I know I should go.
(+20)11.53am: Despite losing the trail, I managed to arrive at the Anti Crow River. You need to cross this river to continue onwards. The river is usually fast flowing and deep in places.
(+10)12.03pm: Checking the map, I know the trail I lost is further upstream, so I walked upstream along the river to find a safe spot to cross the river and found the trail marker on the opposite bank.
(+1)12.04pm: After crossing Anti Crow River, the trail goes up onto a knoll hill.
(+2)12.06pm: Some boarded track with some board-less muddy sections.
(+4)12.10pm: Another section of forest.
(+13)12.23pm: This section of track on the knoll follows closely to the side of Waimakariri River, most times a high bank wall rather than a flat, walkable bank.
(+6)12.29pm: Follow the trail markers.
(+17)12.46pm: Suddenly, I couldn’t spot any markers or obvious trails other than the steep crawl down the river. I spent extra time trying to push through the thick and steep bush but it got obvious that it’s not the way.
(+12)12.58pm: Turns out, the actual trail is that steep slope down into the river. With my short legs I had to cautiously hop down the little cliff drop into the above-knee-deep water.
The reason I couldn’t find the marker down the river was because the marker could only be seen from the outside (river’s side). Do keep a mental note at this spot as you need to remember where to enter this track on your return trip, and not to proceed downstream to the dangerous fast flowing river.
(+8)1.06pm: Back on land.
(+11)1.17pm: Passing by a waterfall.
(+11)1.28pm: Out the open flat land and the rocky, mostly dry (but impassable when flooded) Greenlaw Creek & Harper Creek. Again, lookout for the pole markers some distance away.
(+18)1.46pm: Impressive views of the valley along the way.
(+32)2.18pm: Getting closer to Carrington Hut, which is tucked behind the corner of the turning valley. You can see the serrated Carrington Peak just behind the two mountains.
(+23)2.41pm: Finally, I arrived at Carrington Hut. As mentioned, I would recommend hikers to stay at Carrington Hut before and after the stay at Barker Hut for better quality time without rushing for a full day’s hike.
Interiors of the spacious Carrington Hut.
Carrington Hut to Barker Hut
2.49pm: The trail beyond Carrington Hut starts at the side of the hut. Other than to the White River and Barker Hut, it is also the pathway to the challenging multi day Three Passes Route and Harman Pass Route.
(+13)3.02pm: Back to the bank of Waimakariri River as I approached the turning corner of the river valley.
(+1)3.03pm: Follow the orange triangle markers, sticking closely to the side of the river.
(+1)3.04pm: Some climbs over big boulders.
(+11)3.15pm: Passing the cables above crossing over to the opposite land to Taipoiti River. This was the discontinued (now removed) Clough Cableway that was used to get to the opposite bank to Three Passes Route and Harman Pass Route when the river is unsafe to cross.
This would be an interesting way to cross the river: sitting on a hanging cart and pulleying yourself from end to end. NOTE: For Barker Hut Route, don’t cross here! You may see markers pointing to cross the river, but it’s only for the Three Passes and Harman Pass Routes. There were no markers pointing to the Barker Hut’s way, but it may be different now as DoC might have added some markers when they removed the cableway. If in doubt, check your map and location. From here, there’s no markers to Barker Hut.
(+4)3.19pm: As you continue to the end of Waimakariri River, you’ll find two rivers (Taipoiti River & White River) combining to form Waimakariri River. Turn left (eastwards) to White River and follow it upstream towards Barker Hut.
(+4)3.23pm: As you walk upstream, find opportunities (eg. shallower / slower flowing sections) to cross over to the right side (true left of White River).
Kilmarnock Falls
(+34)3.57pm: The 152 meters tall Kilmarnock Falls appears on the right as I crossed the stream fed by the waterfall.
The stream from Kilmarnock Falls flows strong and fast, so you’ll need to find a safe spot (possibly big rocks to walk on) to cross it.
(+13)4.10pm
(+4)4.14pm
(+14)4.28pm: Still around 5-6 kilometers to Barker Hut, the mystical hut is now visible from far away.
Zooming in, can you see the hut? The tiny red square sits above the head of White River, perches high on the large bluff in the center of the basin.
High Track to Barker Hut
(+5)4.33pm: The DoC ranger from the visitor center informed me to look out for a hard-to -miss big rock by the river with cairns on top. This is it. He said when I see it, I can start moving towards the higher land away from the river to locate the high track route. The high track route goes up the hill through the bushes to avoid the impassable gorge on the river. I suppose you could walk along the river until nearing the gorge, and then start climbing uphill to find the high track route, but since DoC has laid out some poles to guide you through the high track route, it would be wise to follow it.
(+15)4.48pm: The high track route wasn’t that easy to find, but after following some cairns along the hill, I found my first pole (that turns out to be the second pole; I found the first pole on the way back).
(+9)4.57pm: The poles are sparse and you wouldn’t see one after another. Instead, I followed a light goat track through bushes and scree slopes for a distance before finding the next pole.
(+8)5.05pm: Third pole (not very visible in the tall grass)
(+7)5.12pm: Fourth pole (the only yellow colored pole I found, others were orange colored)
(+2)5.14pm: The reason to walk on the right side (true left) of the river is that the opposite side consists of steep mountain faces with limited room to walk plus a high risk of rock fall.
(+2)5.16pm: Beginning of the impassable gorge down below.
(+4)5.20pm: Fifth pole
(+1)5.21pm: A clearer view of the gorge below from the high track.
(+2)5.23pm: Walking through another scree slope towards the sixth pole visible ahead.
(+6)5.29pm: A slightly closer view of Barket Hut on top of the rocky bluff.
(Zoomed in) The ever intimidating sight of the hut as I imagined how I could reach up to it.
(+3)5.32pm: At the end of the high track (no more poles from here; I counted 8 poles along the high track), head back down to the riverbed and continue toward the valley end.
(+7)5.39pm: A naturally(?) balanced rock.
(+10)5.49pm
(+43)6.22pm: As the river approaches another narrow gorge upstream nearing the hut, I followed some cairns and headed up a small hill.
(+3)6.25pm: Over the hill, you now have to scramble down (following a steep, light scree trail) the slope to the last river crossing spot.
(+4)6.29pm: Crossing the ice cold White River, fed by the surrounding glacier and melting winter ice.
(+5)6.34pm: Looking back after crossing the river.
(+23)6.57pm: Climbing up another hill after the river crossing, looking back down the valley.
(+7)7.04pm: It’s all uphill from the river to the hut.
(+1)7.05pm
Barker Hut
(+4)7.09pm: At last, arriving at Barker Hut before the sun was down!
Thick fogs were rolling in and the temperature was lowering so I quickly explored the surroundings.
A beautiful half-frozen tarn behind the hut.
Standing near the edge of the cliff overlooking the valley down below. What an amazing feeling knowing I’ve just traveled such a great distance from this valley up to this magical place!
Interiors of Barker Hut
The rain water tank outside the hut somehow got a big hole opening at the top, and the water looked dirty. Some good samaritans had brought up some water to the hut, what an effort!
There is solar-charged power for USB charging and a light (it has bright mode and dim mode!) in the hut. What more could I ask for?
40 minutes after I arrived at the hut, the whole area was covered in fog. It would be tricky to find my way if I’m still out there…
Day 2 (Barker Hut to Klondyke Corner)
7.11am: After a good night sleep in the hut by myself, I woke up to a crisp morning with a layer of cloud ceiling right above me. Some fog was forming in the valley below and slowly rising. I decided to wait for the fog to rise above me before departing the hut back down to the valley.
9.07am: The morning sunshine gave better views of the surrounding mountains compared to the foggy evening yesterday. Some advanced climbers would start their day climbing to the peaks, such as Mount Murchison and Mount Greenlaw.
A panoramic shot of the mountains and valley.
Glaciers high up the mountains can be seen from the hut’s surroundings.
My favorite view is definitely from the bluff towards the valley! Well. it’d be another day of a long journey back down to the exit.
9.31am: Left the hut and started my journey back down.
(+206)12.57pm: Crossed the high track and down to the valley floor.
(+40)1.37pm: Passed by Kilmarnock Falls again and took the opportunity to refill and quench my thirst with glacier water, filtered by my HydroBlu lightweight water filter.
(+292)6.29pm: Passed by Anti Crow Hut.
(+35)7.04pm: Turkey Flat
(+68)8.12pm: Finally, back to Klondyke Corner car park. What a trip!
Have this guide helped you? Tag @meowtainpeople in your hiking stories & posts!
*Captain Planet passing by* Remember, please take care of our environment, and please don’t destroy the Nature. Leave no trash behind and take back only photos and memories (and also some trash if you can). Walk on the designated path and stay in the middle as much as you can, so that the exposed soil doesn’t spread/corrode further. BE ONE WITH NATURE *flies away*
Affiliate Links to support this site:
Yay for transparency!: The links above are affiliate links, and at no additional cost to you, I earn a commission if you make a booking/purchase after clicking the links. I recommend only products and companies I use. Your support helps me keep the site going 🙂
Want to do the same affiliate marketing with your site? Use this AccessTrade platform link to receive RM5 reward.

