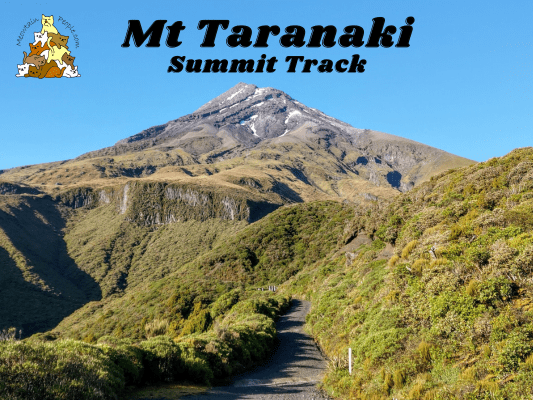
Having seen the close-up view of the majestic snow-covered Mount Taranaki during my epic Syme Hut / Fanthams Peak climb in spring, I eagerly planned my climb to this legendary mountain in the summer. I did the Mount Taranaki Summit Track in mid-late December (early summer), when most of the snow and ice have melted except for the top section of Mt Taranaki.
(Photo above is taken on 5th November, South face, high up from Syme Hut / Fanthams Peak.) From late autumn to spring or early summer, the steep track on Mount Taranaki is covered in ice and snow. Mountaineering experience and winter climbing equipment (eg. crampons & ice axes, with good training and knowledge to use it) are essential during these periods.
(Photo above is taken on 21st December, North-East face, from the mountain foot at North Egmont Visitor Centre.) In the summer, the track is usually accessible for fit climbers without the need of crampons (there is ice in the summit crater all year round.) A return trip takes around 8-10 hours.
Climbing Mount Taranaki via North Egmont
As Mount Taranaki stands tall next to the ocean, the weather conditions here can change extremely quickly. It is very important to check the weather forecast before the journey. Find a day with good weather (eg. dry, low wind, high visibility) for your summit attempt to Mount Taranaki. Leave early to ensure you have enough daylight hours to complete the tramp as it will be a long day.
Bring:
Warm clothes
Rain gears
Water (at least 3L, no water source on the mountain)
Head torch
North Egmont (946 m) to Tahurangi Lodge (1,492 m) - 4km
Seeing the high peak of Mount Taranaki far from the road, enroute to climb the mountain itself was a journey itself. The sight brings much awe and excitement to the climbers.
7.05am: The track starts close to North Egmont Visitor Centre. You can see the full Mount Taranaki on the viewing platform nearby. Follow the signage to the summit climb track.
(+7)7.12am: Cross the stile over a locked gate and walk up the steep gravel track.
There was still some ice at the shaded base, not fully melted.
(+30)7.41am: Uphill all the way.
(+13)7.54am: Already above the carpet of clouds.
(+7)8.01am: Reaching the only toilet at the track. Use it while you can, that’s the kiwi way 😉
(+5)8.06am: The private Tahurangi Lodge, owned by Taranaki Alpine Club. Booking for Tahurangi Lodge can be made here
Tahurangi Lodge (1,942 m) to Mount Taranaki Summit (2,518 m) - 2.3km
(+7)8.13am: The track goes along the back of Tahurangi Lodge. Here is the crossroad where the multi-day Around The Mountain Circuit passes through.
(+3)8.16am: The track gets steeper after Tahurangi Lodge. You’ll have 1000 meters of inclination within the 2.3km to the summit.
(+2)8.18am: Scrambling up the rock-covered gully of Hongi Valley, guided by snow pole markers.
On each snow pole marker there is a little piece of number plate that counts down as you climb towards the peak.
(+11)8.29am: The view when looking back from the valley.
(+1)8.30am: After climbing through the gully, a section of stairs brings you a little higher before the real challenge starts.
(+10)8.40am: Climb steeply on the unstable scree slope.
(+25)9.05am
(+7)9.12am: Yup, definitely steep. Be careful not to send rocks flying down towards other climbers. Also, look out for any rocks rolling or falling from above.
(+22)9.34am: There were still spots of ice around mid mountain.
The Taranaki ‘circle’ can be seen from here. If you look at the satellite image, you’ll see the near perfect circle of unlogged Taranaki National Park reserve.
The Lizard
(+8)9.42am: The smaller scoria scree track will eventually turn to a larger rocky track, which you might find easier and less likely to slip.
(+3)9,45am: Here is the beginning section of ‘The Lizard’.Climbing The Lizard involves using your hands to climb over and around large rocks.
(+3)9.45am: Clouds often pass through the mountain track, significantly reducing visibility. So make sure to choose a clear day for your climb.
(+10)9.55am
(+10)10.05am
(+32)10.37am: More and larger patches of ice as I climbed higher.
10.37am: The views here were totally worth the hustle already!
(+10)10.47am: Just before you reach the crater, the track will narrow down.
(+2)10.49am: I had to walk along a skinny, icy ledge. The large cliffs above and below leave little room for error, not for the faint-hearted.
(+4)10.53am: From the top of The Lizard, I had to carefully traverse down towards the crater via a narrow rocky ledge. The drop-off was steep and icy, with the slope leading down the steep mountain side. Extreme caution required.
(+8)11.01am: Snowy track leading into the wide Mount Taranaki volcano crater. From here there is no snow pole marker.
(+9)11.10am: The path down the crater wasn’t too steep. I manage to get good footing and grips with my rubber Adidas Kampung shoes by kick-stepping the snow. Hmm, this may be the first ever Adidas Kampung to step on snow!
Mount Taranaki Summit Crater
(+2)11.12am: In the crater. Clouds were passing over the mountain so it was foggy for a little while. I felt a drop of temperature as the sunlight is covered by the clouds.
(+4)11.16am: Delightfully, the fog passed.
Mount Taranaki peak stands on the crater. You may climb the short and steep rock (slippery when ice-covered) onto the summit but do not climb and stand directly on the summit stone, as it is a spiritual and sacred peak for the Maori. Also, do not camp, cook or toilet in the summit area.
Fantastic views around the summit crater:
Heading back down at 12pm. The views were superb! The scree track down the steep slope? Not so superb haha:
2.27pm: Two and a half hours later, I was delighted to find myself back at the stairs, which meant the scree track was over!
(+42)3.09pm
I returned to the car park at 3.57pm (total time on track: 8 hours)
Have this guide helped you? Tag @meowtainpeople in your hiking stories & posts!
*Captain Planet passing by* Remember, please take care of our environment, and please don’t destroy the Nature. Leave no trash behind and take back only photos and memories (and also some trash if you can). Walk on the designated path and stay in the middle as much as you can, so that the exposed soil doesn’t spread/corrode further. BE ONE WITH NATURE *flies away*
Affiliate Links to support this site:
Yay for transparency!: The links above are affiliate links, and at no additional cost to you, I earn a commission if you make a booking/purchase after clicking the links. I recommend only products and companies I use. Your support helps me keep the site going 🙂
Want to do the same affiliate marketing with your site? Use this AccessTrade platform link to receive RM5 reward.

